A little fun creation, plushie created from plush felt with felt and embroidery thread eyes, not jointed and fixed head, found its home with a special little girl :D
Showing posts with label Plushies. Show all posts
Showing posts with label Plushies. Show all posts
Sunday, 18 July 2010
A bit of fun
A little fun creation, plushie created from plush felt with felt and embroidery thread eyes, not jointed and fixed head, found its home with a special little girl :D


Sunday, 11 May 2008
Plushie bears group photo 6,7,8.

Finally finished some more plushies bears, I made them each a sweet pinafore dress this time and had fun with ribbon and lace. I hope you can pay them a visit, hugs :O)
http://search.ebay.co.uk/_W0QQsassZquirky_critters
Saturday, 19 April 2008
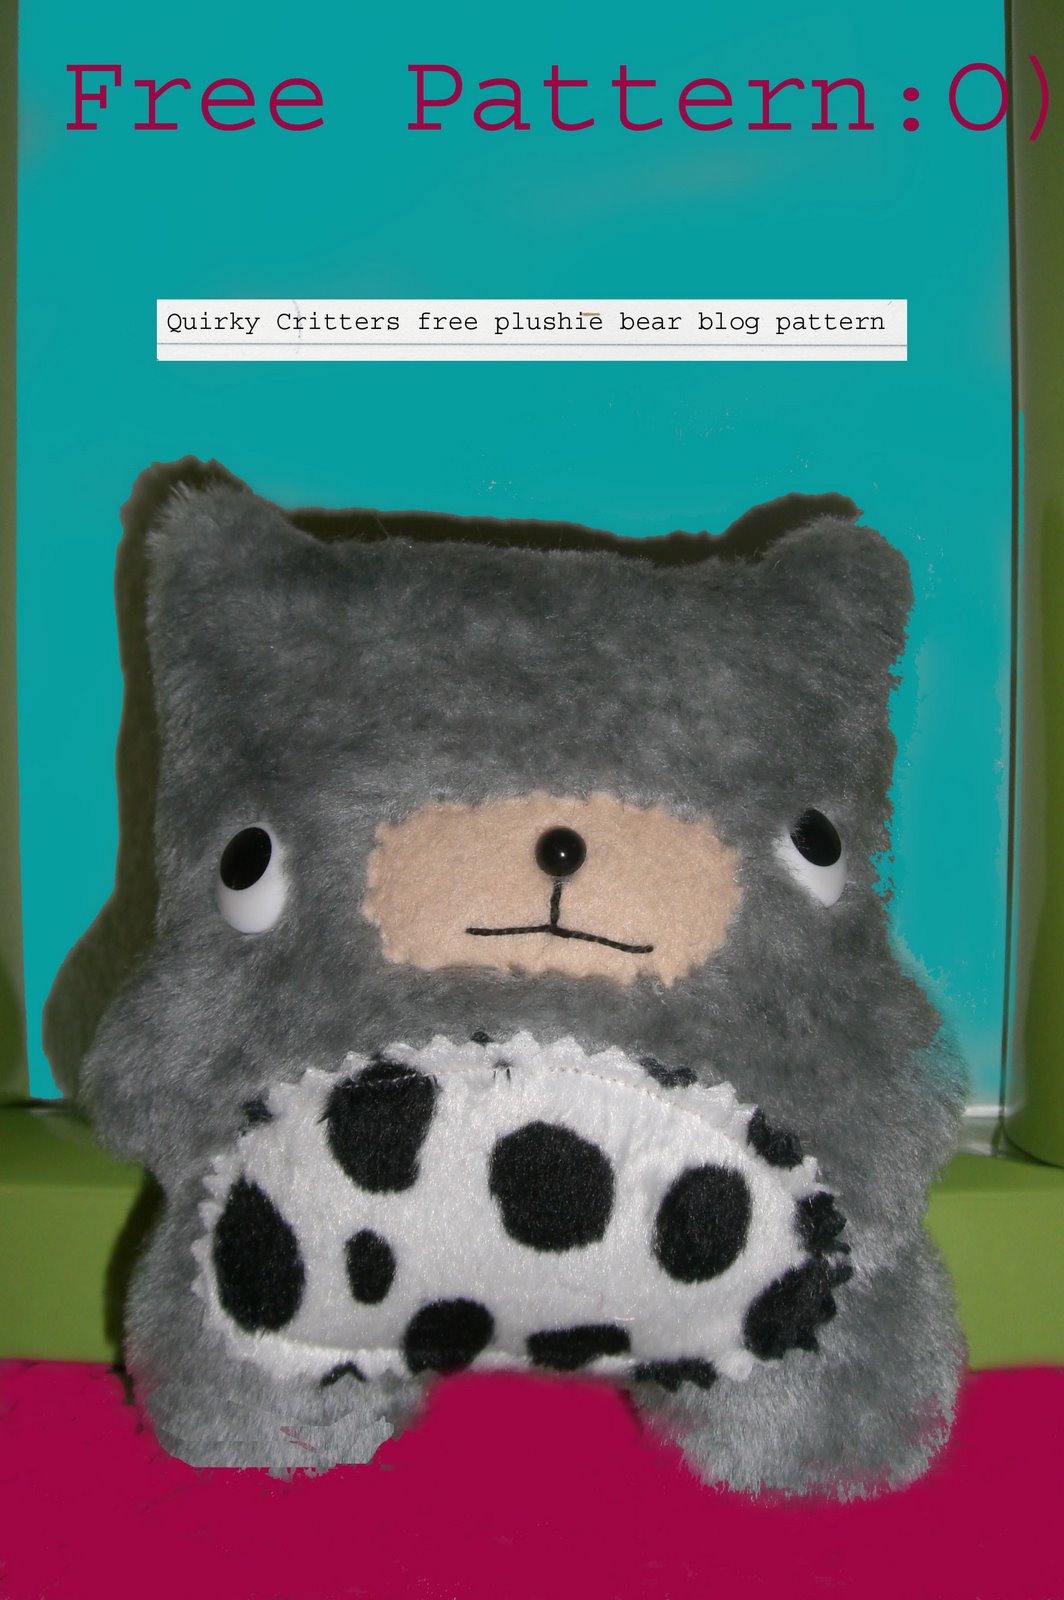
Free plush bear blog pattern

 to download pattern, right click on image, scrole down to open link in new window, and print away:O)
Bear Plushie / softie free pattern / tutorial:
You will need:
Tools:
Scissors
Long nose forceps
Pinking shears (optional)
Fray check (optional)
Pen
Materials:
( a ) A 12 inch wide by 7 inch high piece of plush or felt fabric at least
( b )A 4 inch by 2.5 inch piece of fabric of your choice for the tummy insert ( preferably non fray, or cut with pinking shears and outline with fray check)
( c ) A 2.5 inch by 1.5 inch piece of felt for the muzzle insert
Polyester stuffing
Thread for sewing
Embroidery floss for mouth
Safety eyes x 3, 2 x goggle, 1 x small black for nose
1. Print the free Plushie bear pattern, then glue the paper pattern to card board, when dry cut it out. (I find empty cereal boxes are perfect for this)
2. Fold the piece of fabric (a) in half so it measure 6 inch by 7 inch, right sides (fur) together.
3. Draw round the body pattern piece
4. Pin the fabric together
5. Sew down one side, starting at the ear, down the side nearest to the fold.
6. There are two options at this stage: (i) Easiest: continue to sew round the feet of the bear and up to the other ear, leave the space between the ears open for turning the bear. OR (ii) More Difficult: Unpin the fabric and unfold with the fabric now open find the centre and pin then sew the tummy insert into place. Fold the fabric back together and re-pin, then sew round the feet of the bear and up to the other ear, leaving the space between the ears open for turning.
7. Cut round the sewn bear and turn by hand or using long nose forceps
8. Pin muzzle in place and choose position of eyes, make holes and insert safety eyes and nose. Remove pins.
9. Embroider mouth detail of your choice.
10. Stuff bear, making sure you stuff snugly into the curls of his feet, and the little arms and ears.
11. Sew up head using ladder stitch.
12. Securely attach muzzle either using a ladder stitch or a running stitch. (If you haven’t yet done so now is the time to attach the tummy insert, using a running stitch.)
Your Plushie bear is now complete, feel free to do as you wish with your finished bear but please give me credit as the designer of the original pattern, and feel free to link back to the blog, thanks and hugs, I would love to see your finished Plushie. Enjoy Sammie :O) aka Quirky Critters xx
5. Sew down one side, starting at the ear, down the side nearest to the fold.
6. There are two options at this stage: (i) Easiest: continue to sew round the feet of the bear and up to the other ear, leave the space between the ears open for turning the bear. OR (ii) More Difficult: Unpin the fabric and unfold with the fabric now open find the centre and pin then sew the tummy insert into place. Fold the fabric back together and re-pin, then sew round the feet of the bear and up to the other ear, leaving the space between the ears open for turning.
7. Cut round the sewn bear and turn by hand or using long nose forceps
8. Pin muzzle in place and choose position of eyes, make holes and insert safety eyes and nose. Remove pins.
9. Embroider mouth detail of your choice.
10. Stuff bear, making sure you stuff snugly into the curls of his feet, and the little arms and ears.
11. Sew up head using ladder stitch.
12. Securely attach muzzle either using a ladder stitch or a running stitch. (If you haven’t yet done so now is the time to attach the tummy insert, using a running stitch.)
Your Plushie bear is now complete, feel free to do as you wish with your finished bear but please give me credit as the designer of the original pattern, and feel free to link back to the blog, thanks and hugs, I would love to see your finished Plushie. Enjoy Sammie :O) aka Quirky Critters xx
Bear with me if there are any errors in the pattern as this is my first time sharing, its a pretty straight forward pattern, but any problems drop me a email or comment.
Subscribe to:
Posts (Atom)